Friday, January 31, 2014

The Bread of Life


Bread is the staple diet of countless millions. The basic ingredients are flour, sugar, yeast, salt, water and oil.

At Christmas we were given a surprise present, an Andrew James bread maker. When the demands of the festive season were over, we had time and energy to examine the gizmo. Understanding the instructions took a bit of doing, but we eventually overcame them.

As we had some wholemeal flour to hand, we thought we would have a go at testing the machine. After choosing the appropriate cycle, i.e., the programme for a wholemeal loaf, we added the ingredients, shut the lid and pressed the start button. The indicator showed that the total time for making and baking would be 2 hours and 40 minutes.

Inquisitively, now and again, we peered through the viewing window at the top of the machine to see what was going on. First it kneaded the dough by rotating it with an internal plastic blade. This action was followed by two short periods of inactivity for the dough to rise. Then the actual baking began.

Shortly before time was up, we took another peek through the viewing window. The bread looked wonderfully scrumptious, having a lovely, light golden crusty surface, and the smell was mouth-wateringly delicious.

Imagine our disappointment after removing ‘our’ creation from the pan, when the upper curved surface caved in to form a precipitous crater dipping deeply down into the centre. The object of our short-lived joy resembled a four-sided volcano!

We were well and truly deflated, just like the loaf.

Unlike the bread of disappointment made with outdated yeast, the true Bread of Life will never let you down.

(John 6:35) Then Jesus said to them, “I am the bread of life. He who comes to Me shall never hunger, and he who believes in Me shall never thirst.”

Links

Ingredients in Bread


Making Bread


Andrew James Bread Maker

Thursday, January 30, 2014

Little Things for ‘Minnow’


Little things can make an awful lot of difference. Without them, big things are not complete. Unless a skipper has an eye for detail he can find himself in a pickle. If a small item fails, big happenings can result; for example, if a shackle connecting the mainsheet is not fully tightened and secured, the pin could fall out, causing the mainsheet to part from the boom at a critical moment, perhaps bringing about a broach which becomes a capsize. A capsize could be a matter of life or death.

A fortnight of so ago I recollect saying I had fourteen more jobs to do, but having done most of them I’m left with a new list of eighteen – fortunately, the majority are tiny.

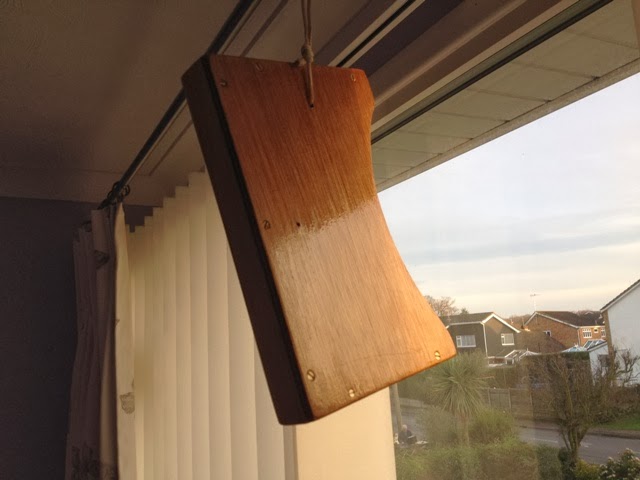
Today, the rain is lashing down, and it is cold. I have no inclination to venture into the garage for working on ‘Minnow’. Instead, I’ve done a little job which on the face of it doesn’t seem important, and yet it could be. I applied a second coat of varnish to the newly made cover of the inspection hatch-cum-vent in the transom. If the plywood is not varnished properly it will in time rot, which could lead to failure, making the boat vulnerable in heavy seas. The varnished wood will make a better seal when in contact with the foam rubber gasket to which it will be secured.

Equipping the boat with little things that matter, always makes a difference for the safety and wellbeing of the crew. An oversight by the tyro Paradox sailor could be not having a stout pair of gloves on board. When you think about it, all handling of the boat, apart from working the yuloh, is done by pulling or easing ropes. The halyard and furling lines are respectively hauled and eased until the sail is set. Considerable effort is required to tension the luff of the lugsail. The most effective way is to exert downward thrust on the fall of the halyard.

One or two Paradox owners have fitted two block purchases to reduce the effort required. The halyard is firstly attached to the becket of a block at the head of the mast, from where it descends to pass though a block attached to the yard, and back to the upper block,  before returning to another one inside the vent box and into the cabin. There it can be handled by the crew and held fast by a jam cleat.

This tugging and easing of the halyards, furling line and steering line plays havoc with the hands. In no time at all, the sailor has painful blisters and open wounds on his palms and fingers. Had the tyro been aware of the likely consequences, he would have invested in a good pair of gloves, or like me, cheap ones, several pairs of which can be acquired for the same money as a single pair of better quality.

Little things can make a lot of difference.

Links

Boat Maintenance


Odds and Ends

Wednesday, January 29, 2014

LED Lights for ‘Minnow’


I inherited two small LED lights when I acquired ‘Minnow’: a silver coloured 3 x LED battery light and a yellow 3 x LED solar powered one. Each of them fits into the palm of my hand. The battery powered light is a Rolson and the other is an Osram DOT-it. Unfortunately, the latter does not work, but I am intrigued by it, because it was powered by light from the sun; hence batteries were not required. That’s highly attractive. However, I’ve not found a source where I can get hold of a replacement.

Yesterday, Richard Green commented that when he was in his local Aldi he found a LED torch-cum-light that can be charged from the mains or from a cigarette lighter. The price was £13.14. His comment probably came in response to me saying I may fit a LED light in ‘Minnow’s’ lazarette. When I tried searching for the Aldi light via ‘Bing’, I was presented with a bewildering number of choices, but as far as I could see, none of them matched the price tag of £13.14.

Amazon markets a multitude of LED lights; including many manufactured by Rolson - the cheapest being only £0.11 for a 24 x LED light!!

I’ve opted to buy a package of three 3 x LED Rolson push lights, plus 9 batteries from Amazon. The total price inclusive of batteries was only £7.36. That’s astonishing value for money, considering each light will operate for about 100 hours before new batteries will be required. I have alternative batteries that are rechargeable, and the means of recharging them on the boat.

Links

Rolson LED Lights by Amazon


Osram DOT-it LED Light

Tuesday, January 28, 2014

‘Minnow’s’ Aft Vent and Port Stowage Rack


Matt Layden primarily designed his Paradox for sailing in the Bahamas which are generally a lot warmer than the UK. One of his concerns was having a supply of fresh air flowing through the cabin. To achieve this he incorporated a forward vent box.  Air enters the box via a large circular opening in the foredeck, from where it is drawn into the cabin. To encourage the flow, Matt added an inspection-cum-vent hatch in the transom. If the hatch cover is removed, air can flow from the front of the cabin to the lazarette and out through the aft vent. In the original boat plans, Matt sited a gimbal cooker in the lazarette; therefore it made sense to build in a vent for dissipating fumes and heat.

I was always doubtful about the strength of the Perspex vent cover fitted to ‘Minnow’. A close inspection revealed small cracks in the Perspex where the retaining pin passed through a central hole. Repeated tightening of the retaining nut must have caused the cracks. To make a more secure hatch I cut one from plywood. Obviously, light does not pass through plywood as it does transparent Perspex, but Matt’s original design had a standard plastic inspection hatch through which no light could pass. In daylight I shall have sufficient light entering the lazarette from the hatchway, and at night I shall have a torch. I might get around to fitting a small led light there.

It is unlikely that I shall want to open the aft vent, because I seldom did when I owned ‘Faith’. Unlike sailors in the Bahamas, keeping the cabin warm will be the priority. I know of one UK Paradox sailor who has a small charcoal stove for this very purpose.

Before making a new vent cover I finished fitting ‘Minnow’s’ port deck stowage rack. Now that this has been completed, I feel confident that I shall be able to secure the whole rig along the side deck. As I pointed out yesterday, the big advantage of stowing the rig there, including the mast, is speed of setting it up.

Monday, January 27, 2014

‘Minnow’s’ Stowage Rails


Matt Layden’s Paradox building plans show two curved brass pipe stowage rails - one either side of the boat. They are strategically placed on the side decks for stowing the yuloh to starboard, and the furled sail with the boom and yard to port.

‘Minnow’ came without rails. Instead of making the standard ones, I adapted an alloy shelf bracket for stowing the yuloh, and I’m in the process of fitting a short stainless steel stanchion to port for securing the rig. If I’m on a canal or a river where I am unable to sail, I shall be able to bundle the whole rig on the port side. I’ve checked that the engine will not be in the way, and that I shall be able to lower and raise it when required.

There is an advantage to stowing the whole rig inclusive of the mast on the port side deck, because setting it up is faster and easier than if the mast is stowed separately within the boat. Matt thought it would be a good idea to stow the mast in the boat when trailering. This could be done by inserting it through the aft vent port, but the task was by no means easy, and the mast was in the way if you wanted to sleep in the boat when on the trailer.

Sunday, January 26, 2014

Around Britain in a Wayfarer - Ludo Bennett-Jones


In 2010 I sailed my Seawych ‘Ladybird’ along the South Coast of England, and at Salcombe I met Simon Renton who was trying to sail his Wayfarer single-handed around Britain. (See 1st link below) I knew he would be up against it, because the weather was unsettled and there was a succession of depressions. Nevertheless before being forced to give up, he raised over £3,000 for Macmillan Cancer Support.

Last year Ludo Bennett-Jones completed a circumnavigation around Britain in a Wayfarer.  Unlike Simon, Ludo had the companionship of volunteers to help share the load. With the aim of raising £100,000 for the Ellen MacArthur Cancer Trust and Sport Relief, he sailed from Cowes, Isle of Wight, on 28th April, 2013, and after a 76 day epic adventure he returned there on 12th July to a rapturous reception, and to be greeted by Ellen MacArthur. The 2,500 mile marathon was rewarded by generous donations to the Ellen MacArthur Cancer Trust.

Links

‘Ladybird’s’ 2010 Cruise Photo Selection – Part 2


Simon Renton


Simon Renton – Just Giving


Ludo’s Sailing Challenge Round the Coast of Great Britain


Dinghy Sailor completes 76-day Circumnavigation of Britain


Love Ludo.com


The Best Bits so far


An Article by Angus who crewed for Ludo from North Devon to Wales


Round Britain in a Wayfarer


Love Ludo at Twitter


Ludo Bennett-Jones – around Britain in a 16ft dinghy


Ellen MacArthur Cancer Trust

Saturday, January 25, 2014

‘Minnow’s’ Reefing System


Incorrect

 
Correct

 
The axle centred

Characteristic of Matt Layden’s micro-sailboats, ‘Minnow’ is rigged with a lugsail furling system that he devised and perfected. Its main components are a furling drum at the forward end of the boom, a curved bronze axle around which the boom rotates, and a brass spacer pipe located between the axle and deck. Within the spacer there is a strop that exits from the lower end, from where it passes through a small orifice in the deck to a cleat within the vent box. When the halyard is hauled tightly, the strop and spacer retain the forward end of the boom. At the same time the boom can articulate from side to side to enable the sail to be sheeted.

‘Minnow’s’ furling system required attention; firstly, because the boom could not be raised sufficiently off the coachroof to facilitate rotation, and secondly, because the reefing line was not correctly aligned at right angles to the drum. Hence, the line bunched and came off the drum.
To increase the length of the brass spacer I inserted it into a longer piece of yellow MDPE piping.
 On a minor issue there was no means of centring the lower end of the axel rod on the bolt between the fork supports of the spacer; therefore I cut small pieces of copper pipe that I placed either side. From now on, the bolt will not be subjected to uneven loading, and the spacer and axle will stay in line.  Finally, I greased the axle.

As a result of these modifications I shall be able to make sail and reef more easily.

Friday, January 24, 2014

‘Minnow’ has a Topping Lift


Without a topping lift

 
With a topping lift

Today I fitted a topping lift. This simple rope contraption makes it easier to shorten or increase sail, because the boom can be supported by it, facilitating its rotation. Without a topping lift it is difficult to keep the sail from coming into contact with the side deck or coachroof. The topping lift can also support the furled sail, which can be secured to one side for keeping the hatchway clear. This is particularly helpful if mooring to port, because normally the sail is stowed along the port side deck, where it is in the way.

Thursday, January 23, 2014

Anti-chafing for ‘Minnow’s’ Anchor Bridle


To prevent wear on ‘Minnow’s’ anchor bridle I made an anti-chafing device from a piece of leather and three small bits of cord. If one of them becomes worn, I can replace it without having to change the others. To avoid excessive wear in the same place I can readjust the bridle by retying it. The bridle will also act as a bow line or painter.

Wednesday, January 22, 2014

An Anchor Light for ‘Minnow’


After varnishing the battery box lid and epoxying the clew fitting I modified a camping lantern for use as an anchor light. Instead of having batteries in the lantern, I wired the internal connections to an electric lead that was fitted with a plug for a 12 volt cigar lighter socket. That means I can take power directly from the ship’s battery. Because the lead is fairly long I can put the light anywhere on the boat. I may even devise a system for hoisting it to the top of the mast for occasional use as an all round white navigation light. Alternatively I could permanently attach it to the masthead.

Tuesday, January 21, 2014

‘Minnow’s’ Clew Fitting


‘Minnow’s’ clew fitting was very badly rusted. Today I filed and ground off the rust. Ideally I should take the fitting for galvanizing, but I’ve chosen an easier and cheaper option that will suffice for a couple of years. I’ve applied a coating of clear epoxy, and tomorrow I shall add another one. A third application should be enough to isolate the iron from the atmosphere. In time the epoxy will become chipped or scratched and sunlight will attack and weaken the surface.

If I still own the boat at that juncture I may make a new boom fitting, or I may get around to having the old one galvanized. A stainless steel fitting would be ideal, but time is running out before my proposed launch date of early April, 2014. I must press on to have all the necessary jobs finished before she is launched.

Monday, January 20, 2014

Raising ‘Minnow’s’ Sail


For the first time I raised ‘Minnow’s’ sail, and I was pleased with the set. The sail may be undersized, but that will mean less reefing, and think there will be ample sail to drive the boat in the sort of conditions I usually encounter off the South Coast.

Small yachts and dinghies are often designed for optimum performance at Beaufort Wind Scale 3, i.e., a wind speed of between 8 and 12 mph. The average summer wind speeds adjacent to the southern coasts of England are generally higher, perhaps Force 4 to 5.

Depending on the direction of travel in relation to the wind, ‘Minnow’ should be able to cope pretty well.

At Force 6, with winds between 25 and 30 mph, sailing will be more demanding. Getting to windward will be more difficult. If ‘Minnow’ is anything like my old Paradox, I’ll have to sail her a bit free. Much will depend upon the sea state.

Running and broad reaching will not be a problem, but if there’s a Force 7, i.e., 31 to 38 mph, I will not want to be there. However, with plenty of sea room she should be OK.

‘Minnow’s’ previous owner gave me a sea anchor (parachute type). However, I have no experience with them, and I don’t ever want to be in a situation where I would seriously consider deploying one.

Links

Beaufort scale

Sunday, January 19, 2014

Ant Steward Alone in an Open Boat Sails around the World


There are people and there are exceptional people. Within the context of what Ant achieved, he is truly exceptional, since no other person has sailed around the world alone in an open boat.

Webb Chiles is another exceptional sailor who almost completed an open boat circumnavigation. He went on to do four circumnavigations in various yachts.

Both men experienced tremendous setbacks such as shipwreck, dismasting, capsizes, each of which they overcame - in Chiles case, the loss of his boat, and almost the loss of his life.

Ant was shipwrecked, and his boat was virtually a total loss, but miraculously she was rebuilt for the completion of his circumnavigation.

What drives such people to the limits of endurance to achieve their goals and dreams makes the mind boggle.

If they survive to tell the tale they can truly say they have lived their dream. If they die while trying to achieve it, they can equally know that before their death, they dared to live. Few of us dare to live as we dream.

Here’s a great 26 minute film telling of Ant Steward’s daring and incredible adventure:


Links

Around alone in an Open Boat


Webb Chiles


Webb Chiles and Chidiock Tichborne


Webb Chiles


Saturday, January 18, 2014

‘Minnow’s’ Battery Box


The new ship’s battery’s vertical dimension is a half-an-inch more than the one it replaces; therefore I’ve had to modify the cover of the battery box to increase its height above the terminals. I attached pieces of wood to the underside of the lid – one at the front and one either side. I can now fasten the strap that secures the cover, and I am satisfied that the terminals and the wires will be protected from anything that may inadvertently be dumped on the box. The cover has a moon shape cut-out on the aft edge for the wires to exit from the box. This opening also acts as a vent for air to circulate. If gas is emitted from the battery, it too can escape.

I plan to stow my inflatable canoe forward of bulkhead two where the battery is housed. Because I’ve modified the lid of the battery box I can be confident that the terminals and wiring will not be dislodged or damaged. I’ll probably stow the three-part paddle there too.

Friday, January 17, 2014

Selling Boats Through Ebay


Mariner's Mate

 
Magnifik Midget

A theme worth reviewing at this time of year is the sale and purchase of boats through Ebay. I have used the facility more than once to good effect.

Bargains can be found. Here are two sailing boats that could be worth exploring: A Mariner’s Mate (Ebay #111258162633) and a Magnifik Midget (Ebay #141161773249) I am not recommending these particular boats as bargains, or good value for money. They just appeal to me and they may appeal to you.

Read my article ‘Ebay for Selling and Buying Boats’* and be careful to observe my advice to SEE a boat before bidding or buying her.

Links

*Ebay for Selling and Buying Boats


‘Talitha’ is for Sale at Ebay


‘Sandpiper’ at Ebay Auction


Bidding at Ebay has commenced for selling ‘Sandpiper’


‘Caleb’ 50/50 Canoe on Ebay (An old article)


‘Kudu’ for Sale at Ebay (Anther old article)

Thursday, January 16, 2014

Sailing Paradox Scout – What’s it like?


Sean Mulligan has entered the micro-sailboat realm and is being invigorated by it – not that he lacked energy and enthusiasm for sailing before becoming the owner of the Paradox Tardis which he renamed Scout. He acquired the Matt Layden designed solo cruiser from Lezlie Hensen* who built the boat to a high standard. Sean was the founder of the Havasu Pocket Cruiser’s Convention and previously sailed with his wife Jo on their trailer sailer named Dauntless which they still own and sail.

Sean has done a great job of finishing Scout, and he has frequently sailed the boat over the past few months on Lake Havasu. He has made launching and recovering a piece of cake; in twenty or so minutes he can have her from being on terra firma to being in the water. Mind you, the slipway is ideal, since it is non-tidal and has a jetty alongside, to which the boat can be moored while he adds water ballast and does final preparations.

The element that Sean has brought to the Paradox sailboat global fraternity is his dynamic energy which is contagious. His old Blogspot blog**and more recently his new website Full n By.com*** are packed with useful information and great accounts of his sailing challenges, photos and videos. Sean also has a fabulous YouTube Channel.****

Link

*Leslie’s World


**Full n By (Sean’s old blog)


  ***Full n By (Sean’s new website)


****Sean Mulligan’s  YouTube Channel


Sailing Paradox ‘Scout’ – What’s it like?


Much Interest in Tardis (I was the one who phoned Lezlie – see last link)


Tardis Moves to Arizona


Pocket and Micro-Cruisers – A Band of Brothers


Lake Havasu


Importing a Paradox to the UK from the US East Coast

Wednesday, January 15, 2014

Fixing ‘Minnow’


By the time I finish preparing ‘Minnow’ for the water I will have made changes to most things. Today I devised an arrangement that secures the kedge anchor in its stowed position, and I fitted a hinge to the cover of the chain and warp locker. I also made a bracket for securing the lid of the aft bilge locker. Only two more locker lids require gizmos to stop them from opening in the unlikely event of a 180 degree capsize.  If that dreadful situation were to arise, loose items on the shelves and in the lazarette would fall out of their compartments, on account of gravity.

I would rather not think about it, but all heavy items would stay in place, including the ship’s battery – that’s if I finish the cover for the box in which it is housed.

‘Minnow’ is designed to self-right. The combination of buoyancy provided by the coachroof and ballast strapped to the floor, plus the convex fore and aft decks, will act to right the boat. Wave motion would flip the boat the right way up. Her short, stout mast and low aspect sail would not greatly impede the righting action. Her ballast ratio is above average, and her AVS (Angle of Vanishing Stability – the point at which the upthrust of centre of buoyancy and the down thrust of the centre of gravity are in line) is way above average at 160 degrees. Only another 30 degrees of roll would bring her completely upside down.

Links

Boat Stability


Hull Speed and the Speed/Length Ratio


Understanding the Prismatic Coefficient


Al Law’s ‘Little Jim’ Undergoing Capsizing Load Measurements

Tuesday, January 14, 2014

Anchoring ‘Minnow’ or any Paradox


The easiest way to set or weigh an anchor with a Paradox is to do it while standing in the cabin with the upper part of your body wedged in the hatchway. There you are safe and secure. Do not try going on the foredeck to anchor. It can be done, but I do not recommend it.

To anchor the boat you select the amount of warp and chain you require, and tie the warp to an eye that is permanently fixed to an anchor bridle. The latter is a line attached to both cleats at the bow, from where it passes along the starboard side deck, and it is made fast to the starboard aft cleat.

Having tied the warp to the eye, you lower the anchor, chain and the selected length of warp over the starboard side of the boat, taking care not to drop the chain on the anchor. As the boat drifts away, you pay out the bridle until it becomes taught by the pull of the warp. You are now anchored. Secure the tail end of the bridle to the aft cleat. Tidy any unused warp by flaking it into a bucket which can be lashed to the stern deck.

If you want to increase the length of the warp, first pull on the bridle until the eye is within reach. Undo the warp and payout more of it. When the required amount has been let out, tie the warp to the eye; ease the bridle until the warp and bridle take the strain.

To retrieve the anchor or shorten the warp, reverse the procedure.

When retrieving the anchor, you can safely lean over the side of the boat to clean off weed or mud by scrubbing things with a small brush while they are still in the water. A toilet brush is ideal for the job. As you haul in the warp and chain you flake them into a large bucket or waterproof plastic container. The whole lot, including the anchor is pushed forward on the cabin floor. By doing it this way, the cabin can be kept fairly clean. Later, if you want to do a better job, you can do it at your leisure.
PS
When you are hauling in the anchor, the boat usually stays broadside to the current or wind – sometimes from the starboard quarter. Take care not to get the warp trapped between the rudder and the transom.